What's the difference between an Easy On® Dust Ruffle and a regular dust ruffle?
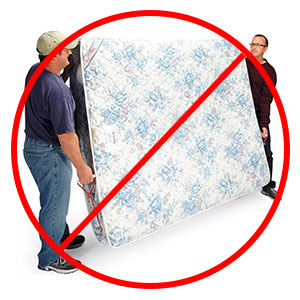
Easy On® Dust Ruffles are, as the name implies, easier to put on your bed than a regular dust ruffle. There is no need to remove your mattress just to install the dust ruffle! We've made it a one-person job with the Easy On® Dust Ruffle Design. |
How do Easy On® Dust Ruffles work?Easy On® Dust Ruffles from Allyson Brooke Home come in three sections; two sections for the sides and one section for the foot of the bed. Easy On® Dust Ruffles have a flat matching strip of fabric attached to the drop. To install your Easy On® Dust Ruffle, you only need to slide your mattress over a few inches! Detailed instructions are listed below. |
Click here to view larger image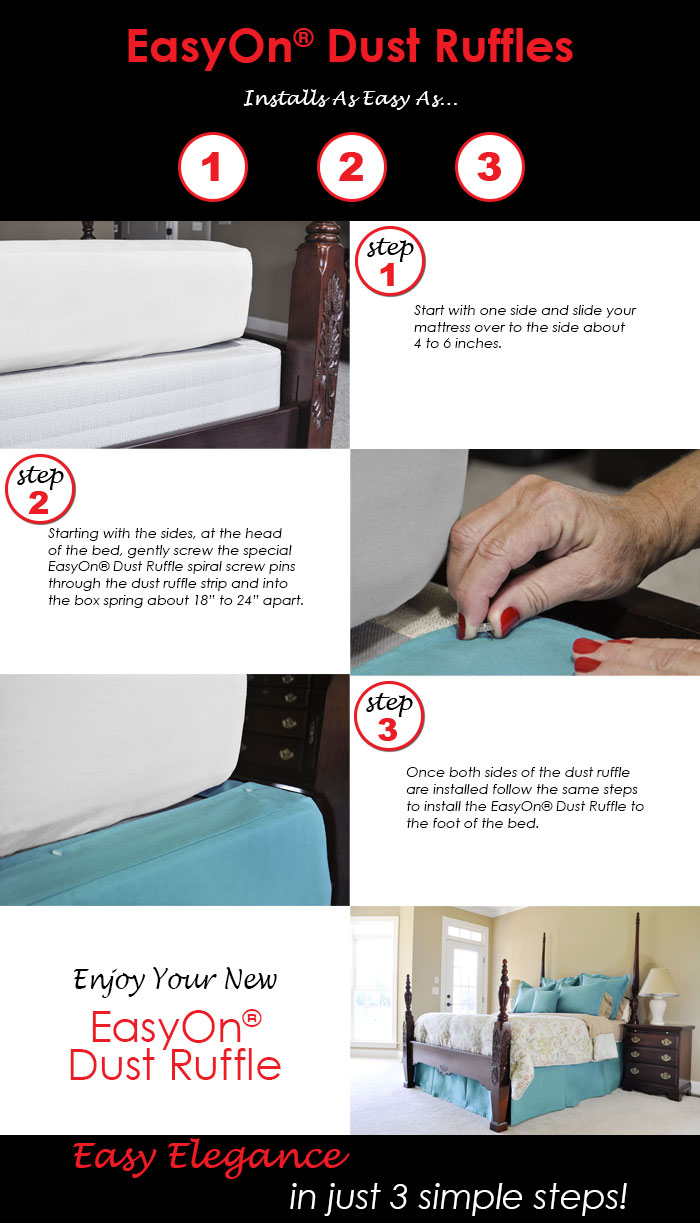
How to Install an Easy On® Dust Ruffle:Installing an Easy On® Dust Ruffle is as easy as 1-2-3!
Voila! See how easy that is! You have just installed a dust ruffle that hangs perfectly and won't slide around. ENJOY! |
|
Click Here to download a printable version of these instructions. A PDF viewer is required. We reccommend using Adobe Acrobat Reader. |
| We carry a large assortment of products that coordinate with our Easy On® Dust Ruffles. Click here to view our entire Pebbletex™ Collection. |